Downtime

Downtime

Recently my server went down! Well… not exactly… It did however stop serving pages with a trusted certificate. Looking into this took my NGINX container down and required some updates. So, without further ado, here’s what happened…

First Things First!

I try to be as transparent as possible. I am hosting a few other websites on my provider using containers, so I loaded up MailChimp and fired off an email to my hosts. It went something like this:

Ruh roh!

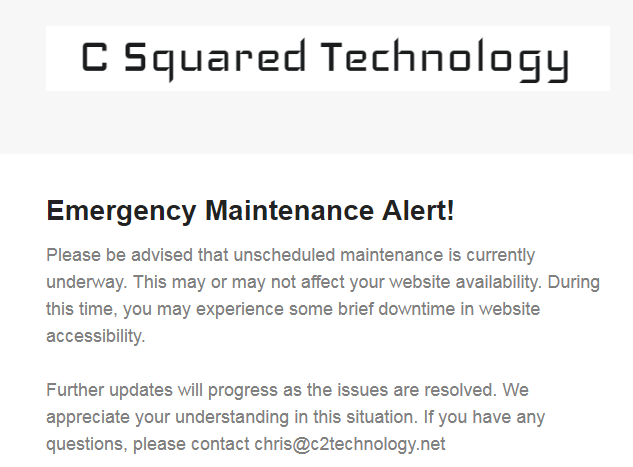
Yep, simple and sweet. Nothing too foreboding, but just enough to let everyone know their site may be down or otherwise inaccessible. Once that was fired off I started digging in!

Confident that restarting might fix it, I used localhost as the guinea pig. And, <sad trombone sound> it still had the same issues. Seemed like an NGINX issue, so I restarted that too. Still no luck. Looking at the NGINX logs I see the restart just mentioned an unknown “virtual host” environment variable. That’s weird, this only routes to virtual hosts, it isn’t one of them not does it know of any of them via an environment variable… Interesting…

Let’s Get Sleuthy

Digging into the NGINX Generator container logs didn’t show anything out of the ordinary, and the Let’s Encrypt companion container didn’t turn up any weirdness either.  So I started with the NGINX container configurations to see what was up. I went through /etc/nginx/conf.d/default.conf and found the environment variable there so it was somehow passed down to the NGINX Generator which then wrote it into the NGINX config. Thankfully (SO THANKFUL) the NGINX Generator also commented which container this configuration was written for. If you recall, I was previously working on my Alexa Bot a deploy by this project was triggered with no value for the VIRTUAL_HOST variable. NGINX Generator decided that was the literal value and passed it on the the NGINX configs. Fixing this required going outside the automated deploy pipeline. I ran a shell on the NGINX container and opened up the default.conf file again and just removed the block. Restarting NGINX still had the same environment variable issue.

Taking a look at the running containers, the Alexa Bot was still running (presumably with the wrong VIRTUAL_HOST variable). So I killed it and restarted NGINX… same error. Again I opened a shell on the NGINX container and opened the default.conf file and the VIRUTAL_HOST variable was back! NGINX Generator must have picked up a change and re-wrote the config with the Alexa Bot container values. Oops! Removed the block again and NGINX restarted just fine without the environment variable issue. Success! Let’s reboot the whole NGINX stack (NGINX, NGINX Generator, and the NGINX Let’s Encrypt Companion containers). Everything restarted just fine! Perfect!

But Wait, There’s More!

Going to localhost still had a certificate issue. But alllll the other sites worked fine. This was super weird. So, easy thing to do was to restart the container for the site! Nope. Still had an expired cert. But, this time, it was a self-signed certificate by the Let’s Encrypt Companion. Different results are good right? I took a peek in the Let’s Encrypt Companion container and there it was! I had added the IP address of the localhost server as a Virtual Host to the NGINX Generator configurations, which were then written to the NGINX configs. This works great in NGINX land. But SSL certificates are only ever issued to host names. I removed the IP address form the localhost build parameters and viola! It’s back up and running! Following up with my users, I sent an email to them that looks something like this:

Everything is awesome!

Post Mortem

The root cause of this issue was related to an unrelated build which was poorly configured. This is not a shock given it was a Hacktoberfest project. Fortunately, this was specifically isolated to the localhost hosting. Unfortunately, having to restart the NGINX container brought down all other hosted sites. This did highlight a flaw in our build pipeline for Let’s Encrypt certificates. The Virtual Host and the  Let’s Encrypt Host values were shared. Isolating each to their own variables would have prevented this issue while still retaining the NGINX handling for the raw IP address. By the time this is published, this will already be resolved, but is does serve as a reminder that configuration shortcuts can definitely cause some obfuscated problems. This particular problem lasted 2 hours, 59 minutes, and 49 seconds.

Managed Website

Managed Website

As I had previously mentioned I recently wiped my host machine for my website. Go ahead, check out the Wayback Machine for it. From beginning to end it’s been rather static and consuming the entire purpose of a remote server. During this “reset” I wanted to more fully utilize my server. I wanted to do this using Docker and isolate any state (the database, as in this article you are reading right now) to a second storage container so that the main container is easily managed in the event things go sideways. This article explains how I did this using Docker and GitLab’s Continuous Integration framework.

Plan the Work

From the start I knew I wanted a WordPress website. WordPress uses MariaDB (or, the MySQL Community Edition) for storage. So, reasonably, I’d want a container for WordPress and a container for MariaDB to separate container responsibilities. Easily enough they already exist. So, we are going to keep the whole orchestration simple by using a single GitLab CI script. To keep things even more simple, there is only one step: deploy. This step will handle everything that is required to deploy the website as an entire solution. This entails:

  1. Create the Storage Container
  2. Create the WordPress Container
  3. Create a Backup Container with scheduled backup job
  4. Create a Dropbox Container with scheduled upload job

Trust me, it sounds way more complicated than it is. We are simply creating 4 containers and 2 volumes then doing some periodic shuffling of data.

Work the Plan

Now that we know all that we need to do, let’s automate it! Our GitLab Runner is a Shell based Runner. This means that the commands are run on the host computer and not within a Docker-in-Docker container. This lets us create and manipulate containers on the Docker host. Pretty handy for automation! Let’s focus on the script block…

Create the Storage Container

The first step in launching any container is to create it. We create the Strorage Container in 5 lines:

  - docker pull mariadb:latest
  - docker stop -t 0 ${STORAGE_CONTAINER} || true
  - docker rm ${STORAGE_CONTAINER} || true
  - docker volume create ${STORAGE_VOLUME}
  - docker run -d --name ${STORAGE_CONTAINER} -v ${STORAGE_VOLUME}:/var/lib/mysql -e &amp;amp;quot;MYSQL_ROOT_PASSWORD=${DB_ROOT_PASSWORD}&amp;amp;quot; -e &amp;amp;quot;MYSQL_DATABASE=${DB_NAME}&amp;amp;quot; -e &amp;amp;quot;MYSQL_USER=${DB_USER}&amp;amp;quot; -e &amp;amp;quot;MYSQL_PASSWORD=${DB_PASSWORD}&amp;amp;quot; --restart always mariadb:latest

On lines 1 – 3 we update the MariaDB image, stop any existing storage containers, then remove any stopped storage containers. This sets up the Docker host for creating a brand spanking new container hot off the update MariaDB image in the Docker repository. The next step (line 4) we create a new named volume. If this volume exists nothing happens. Finally, in line 5, we start a new container with the storage volume mounted it.

Create the WordPress Container

In a very similar process, we create the WordPress container. This container will simply host the WordPress installation and be configured to talk to the MariaDB database.

  - docker pull wordpress:latest
  - docker stop -t 0 ${WEBSITE_CONTAINER} || true
  - docker rm ${WEBSITE_CONTAINER} || true
  - docker volume create ${WEBSITE_VOLUME}
  - docker run -d -P --link ${STORAGE_CONTAINER}:mysql --name ${WEBSITE_CONTAINER} -v ${WEBSITE_VOLUME}:/var/www/html/wp-content -e WORDPRESS_DB_USER=${DB_USER} -e &amp;amp;quot;WORDPRESS_DB_PASSWORD=${DB_PASSWORD}&amp;amp;quot; -e WORDPRESS_DB_HOST=mysql -e WORDPRESS_DB_NAME=${DB_NAME} -e LETSENCRYPT_EMAIL=${EMAIL} -e &amp;amp;quot;LETSENCRYPT_HOST=${HOSTS}&amp;amp;quot; -e &amp;amp;quot;VIRTUAL_HOST=${HOSTS}&amp;amp;quot; --restart always wordpress:latest

Once again, lines 1 – 3 update the WordPress image from the Docker repository, stops any existing containers, then removes the stopped containers. Line 4 we create a new named volume before finally launching a new WordPress container. Line 5 is a little different though. Here, we actually link the Storage Container to the WordPress container. This creates a private network between the two for network traffic. This keeps the Storage Container inaccessible from the Internet at large while still allowing the WordPress container to communicate with the databases it’s hosting. The volume we mount to this container stores plugins and uploads and has nothing to do with the database. Oh, and the container starts with configurations to automatically integrate with out NGINX proxy service that handles automatic SSL configurations (maybe a post later on that one)!

Create a Backup Container with scheduled backup job

What’s a website if it’s not backed up? Risk. So, let’s reduce that! Since we have modular storage for each of the containers we are running, we can mount them to other containers as well. This, admittedly, is a bit risky and I don’t recommend this for very busy sites for the simple reason as the data being backed up has the potential to be written to as it’s being read for backup. This can obviously corrupt a backup or fail a web request.

  - docker pull aveltens/wordpress-backup:latest
  - docker stop -t 0 ${BACKUP_CONTAINER} || true
  - docker rm ${BACKUP_CONTAINER} || true
  - docker run --name ${BACKUP_CONTAINER} -v ${BACKUP_VOLUME}:/backups --volumes-from=${WEBSITE_CONTAINER} --link=${STORAGE_CONTAINER}:mysql -e &amp;amp;quot;BACKUP_TIME=0 5 * * *&amp;amp;quot; -d aveltens/wordpress-backup:latest

Lines 1-3 update the container image, stops it, then cleans up. Line 4 starts a new Backup container with a Backup volume mounted. It also has any volume mounted to the WordPress container also mounted and it’s linked to the MariaDB container. This lets the Backup container copy files from the volumes mounted on the WordPress container and it allows database access to the MariaDB. This particular image we use will automatically compress files from the mounted volumes and perform a database dump to a text file before compressing that as well. This all runs on a configurable schedule defined by the BACKUP environment variable. Each interval defined (in this case every 5 hours) these backup files are created then copied to the backups directory, which we conveniently mounted the Backup Volume.

Create a Dropbox Container with scheduled upload job

Now that we have a Backup Volume containing all our important data, we need to store that somewhere less volatile. I picked Dropbox since it has free storage and I don’t intend to keep every backup I make. Thankfully, there’s a Docker image for that!

    - docker pull janeczku/dropbox:latest
    - docker stop -t 0 ${DROPBOX_CONTAINER} || true
    - docker rm ${DROPBOX_CONTAINER} || true
    - docker run -d --restart=always --name=${DROPBOX_CONTAINER} -v ${BACKUP_VOLUME}:/dbox/Dropbox janeczku/dropbox

Once again, lines 1 – 3 are all about updating, stopping, and cleaning up. Line 4 starts the container using the Dropbox image. We mount that Backup Volume to the Dropbox directory. The Dropbox directory is linked with my Dropbox account and anything that gets placed in this directory is automatically uploaded to the cloud. Viola! We have automated backups! Since this container automatically removes backups older than 90 days, I don’t have to worry for a while about reaching the maximum data for the free tier of Dropbox.

Pulling It All Together

We have several stages of our build we are orchestrating: the container, the database, the backup, and the upload. These are all handled in about 20 lines of code. While this isn’t the smoothest of processes I haven’t had any problem and have been able to replicate it for other websites I also am hosting. This brings me a managed method of automating deployments. It’s pretty cheap to put together and I’m sure it has some room for improvements. If you have any ideas on how to improve this solution, share it with the world! Leave a comment below and I will most likely see if I can incorporate your idea into the next iteration.

Hacktoberfest: Gitlab Artifacts

Hacktoberfest: Gitlab Artifacts

Hacktoberfest is upon us! This month I’m hacking on small projects each week and sharing them.

Background

Gitlab is a great alternative to GitHub. One of the main features I find is the ability to have unlimited private repositories for free.  This lets me work on things without having them publicly exposed until I’m ready for them to be. In addition to private repositories, it also has a private Docker Registry you can store your Docker images in. GitLab also has other built in CI/CD capabilities like secrets that are passed to the CI/CD orchestration file. GitHub has CI/CD capabilities too, but I feel like GitLab seems less involved for setting it all up.

All of my CI/CD jobs are orchestrated in a gitlab-ci.yml file that sits in the repository. Couple this with a self-hosted GitLab Runner with Docker installed and I have a true CI/CD solution where tagging master triggers an automatic build of the tagged code, publishing the Docker image built during this job, and a deployment of that Docker image to a container (replacing the existing on if present). While this does require some thought into how to persist data across deployments, it does make it very easy for automatic deployments. In the event something does go wrong (and it will) you can easily re-run any previous build making rollbacks extremely simple with a one click solution. Repeatability for the win!

Artifacts

So, this week I was attempting to learn the Artifact system of the GitLab API. Instead of mounting a directory to pass files between jobs, GitLab has an Artifacts API that allows GitLab to store (permanently or temporarily) any number of artifacts defined in a successful pipeline execution. These artifacts are available via the web and the Artifacts API. I have several Go projects that could benefit from cross-compiling the binaries. Why not store these compilations so they are easy to grab whenever I need them for a specific environment? As an added benefit, after compiling once, I could deploy to various environments using these artifacts in downstream jobs. So, I jumped at this chance and found it less than ideal.

The Job

There is a Job API document defining how to create artifacts within a pipeline. It looks as simple as definining artifacts in your gitlab-ci.yml file:

<br>
artifacts:<br>
  paths:<br>
    - dist/<br>

Creating artifacts is the easiest bit I came across. This will auto upload the contents of the dist folder to the orchestration service which will make it available on the GitLab site for that specific job. Easy peasy!

Getting those artifacts to a downstream job is pretty easy as well if you keep in mind the concept of a build context and have navigated GitLab’s various API documents. Thankfully, I’ve done that boring part and will explain (with examples) how to get artifacts working in your GitLab project!

The Breakdown

The API documentation that shows how to upload artifacts also shows how to download artifacts. How convenient! Unfortunately, this is not within the framework of the  gitlab-ci.yml file. The only API documentation you should need for multi-job single-pipeline artifact sharing is here:  YAML API. For other uses (cross-pipeline or scripting artifact downloads) you can see the Jobs API (warning: cross-pipeline artifacts are a premium only feature at the time of writing).

Looking at the Dependencies section the dependencies definition should be used in conjunction with artifacts. Defining a dependent job will cause an ordered execution and any artifacts on the dependent job will be download and extracted to the current build context. Here’s an example:

<br>
dependencies:<br>
  - job:name:<br>

So, what’s a build context? It’s the thing that’s sent to Docker when a build is triggered. If the artifacts aren’t part of the build context, they won’t be available for a Dockerfile to access (COPY, etc).

Here’s the gitlab-ci.yml example:

<br>
stages:<br>
  - build<br>
  - release</p>
<p>build-binary:<br>
  stage: build<br>
  image: golang:latest<br>
  variables:<br>
    PROJECT_DIR: "/go/src/gitlab.com/c2technology"<br>
  before_script:<br>
    - mkdir -p ${PROJECT_DIR}<br>
    - cp -r $CI_PROJECT_DIR ${PROJECT_DIR}/${CI_PROJECT_NAME}<br>
    - go get github.com/tools/godep<br>
    - go install github.com/tools/godep<br>
    - cd ${PROJECT_DIR}/${CI_PROJECT_NAME}<br>
    - godep restore ./...<br>
  script:<br>
    - ./crosscompile.sh<br>
  after_script:<br>
    - cp -r ${PROJECT_DIR}/${CI_PROJECT_NAME}/dist $CI_PROJECT_DIR<br>
  tags:<br>
    - docker<br>
  artifacts:<br>
    paths:<br>
      - dist/<br>
    expire_in: 2 hours</p>
<p>publish-image:<br>
  stage: release<br>
  image: docker:latest<br>
  services:<br>
    - docker:dind<br>
  only:<br>
    - "master"<br>
  variables:<br>
    DOCKER_HOST: tcp://docker:2375/<br>
    DOCKER_DRIVER: overlay2<br>
  before_script:<br>
    - "docker login -u $CI_REGISTRY_USER -p $CI_REGISTRY_PASSWORD $CI_REGISTRY"<br>
  script:<br>
    - docker build -t ${CI_REGISTRY_IMAGE}:${CI_COMMIT_REF_NAME} --pull $CI_PROJECT_DIR<br>
    - docker push ${CI_REGISTRY_IMAGE}:${CI_COMMIT_REF_NAME}<br>
  after_script:<br>
    - "docker logout ${CI_REGISTRY}"<br>
  tags:<br>
    - docker<br>
  dependencies:<br>
    - build-binary<br>

And the crosscompile.sh

<br>
#!/bin/sh<br>
echo "Cross compiling alexa-bot..."<br>
for GOOS in darwin linux windows; do<br>
  for GOARCH in 386 amd64; do<br>
    echo "Building $GOOS-$GOARCH"<br>
    export GOOS=$GOOS<br>
    export GOARCH=$GOARCH<br>
    go build -o dist/alexa-bot-$GOOS-$GOARCH<br>
  done<br>
done<br>
echo "Complete!"<br>

In this example, we cross-compile a Go binary and artifact it in the build-binary job before executing the public-image job (which is dependent on build-binary). This downloads and extracts the artifacts from build-binary and sends the project directory (including the downloaded artifacts) as the build context to Docker when building the Dockerfile. Let’s look at the Dockerfile:

<br>
FROM alpine:latest<br>
RUN apk add --no-cache --update ca-certificates<br>
COPY dist/alexa-bot-linux-amd64 /bin/alexa-bot<br>
RUN chmod +x /bin/alexa-bot<br>
EXPOSE 443<br>
# Run the binary with all the options<br>
ENTRYPOINT [ "alexa-bot -c " + $CLIENT_ID + " -s " + $CLIENT_SECRET + " -x " + $SERVER_SECRET + " -t " + $PRODUCT_TYPE_ID + " -n 123 -v " + $VERSION + " -r " + $REDIRECT_URL + " -z " + $TOKEN_URL ]<br>

You can see here that the Dockerfile starts with Alpine Linux as the base Docker image, updates the CA certificates then copies the dist/alexa-bot-linux-amd64 binary from the Docker build context to the compiled Docker image then gives it executable permissions. The rest of the file sets up the port the binary will listen to and passes the configurations to the image.

Once this Docker image is pushed to GitLab’s private repository, the Docker image is available to run (provided with some environment configurations)!

Conclusion

All in all, this seems to work out great for single pipeline builds. When you get into multi-pipeline builds things get even trickier. I found that the artifacts system didn’t quite meet my requirements and I opted for condensing builds and not artifacting the compiled binaries. I could, however, trigger a pipeline that cross-compiles and artifacts the compiled binaries and run a second pipeline that also cross-compiles the binaries (duplicated work) then creates an image. Ultimately, I didn’t really care about the artifacts as my purpose was always to create the Docker images. As usual, your mileage may vary!

Hacktoberfest: Use Alexa without talking!

Hacktoberfest: Use Alexa without talking!

Hacktoberfest is upon us! This month I’m hacking on small projects each week and sharing them.

Backstory

When we sleep at night, we like to have some background white noise to help with sleeping. Since we have an Echo in our kitchen and an Echo Dot in our bedroom, we ask it to “play rain sounds” which starts a lovely little piece of audio that puts us right to sleep . Unfortunately, it does not look and after an hour it stops. The sudden silence sometimes wakes me up, and I can’t restart it without talking to Alexa and potentially waking up my wife, and nobody wants that! So, I started researching how to talk to Alexa without talking to her and I came across this article on the DolphinAttack. This got me thinking about a device which could leverage this vulnerability, but quickly gave up as it involved more hardware than I wanted and there was a lot of setup. So, I kept researching and came across this forum which talked about a workaround! This seemed more promising and more similar to what I wanted.

The Goal

My goal for this week’s hackathon was to create a Slack Bot for talking to Alexa. The idea is that the Slack App received a text command to send to Alexa, converts the text to a speech audio file, then sends it to the device I want to receive it. This would let me send a text message to Alexa in the middle of the night without ruining my wife’s sleep!

The Backend

Thankfully, there is already an open source GitLab project for handling the audio file push and an article that shows how to use it! I started by manually proving the concept before moving forward. After this proof-of-concept seemed like it would work out, I started on a Dockerfile to set this baby up!

<br>
FROM alpine:latest<br>
ARG CLIENT_ID<br>
ARG CLIENT_SECRET<br>
ARG PRODUCT_TYPE_ID<br>
ENV CLIENT_ID $CLIENT_ID<br>
ENV CLIENT_SECRET $CLIENT_SECRET<br>
ENV PRODUCT_TYPE_ID $PRODUCT_TYPE_ID<br>
RUN mkdir -pv /opt/alexa<br>
WORKDIR /opt/alexa<br>
COPY *.sh ./<br>
RUN chmod +x *.sh<br>
RUN apk add --update ca-certificates \<br>
    espeak \<br>
    curl<br>
RUN (crontab -l ; echo "*/20 * * * * /opt/alexa/refresh_token.sh") | crontab -<br>

And a GitLab YAML file to auto-deploy it

<br>
stages:<br>
  - build<br>
  - deploy<br>
build-image:<br>
  stage: build<br>
  image: docker:latest<br>
  variables:<br>
    DOCKER_HOST: tcp://docker:2375/<br>
    DOCKER_DRIVER: overlay2<br>
  services:<br>
    - docker:dind<br>
  only:<br>
    - "master"<br>
  before_script:<br>
    - "docker login -u $CI_REGISTRY_USER -p $CI_REGISTRY_PASSWORD $CI_REGISTRY"<br>
  script:<br>
    - "docker build -t ${CI_REGISTRY_IMAGE}:${CI_COMMIT_REF_NAME} -t ${CI_REGISTRY_IMAGE}:latest --pull ."<br>
    - "docker push ${CI_REGISTRY_IMAGE}:${CI_COMMIT_REF_NAME}"<br>
    - "docker push ${CI_REGISTRY_IMAGE}:latest"<br>
  after_script:<br>
    - "docker logout ${CI_REGISTRY}"<br>
  tags:<br>
    - docker<br>
deploy-image:<br>
  stage: deploy<br>
  image: docker:latest<br>
  only:<br>
    - "master"<br>
  variables:<br>
    C_NAME: "alexa-bot"<br>
  before_script:<br>
    - "docker login -u $CI_REGISTRY_USER -p $CI_REGISTRY_PASSWORD $CI_REGISTRY"<br>
  script:<br>
    - "docker pull  ${CI_REGISTRY_IMAGE}:latest"<br>
    - "docker container stop -t 0 ${C_NAME} || true"<br>
    - "docker container rm ${C_NAME} || true"<br>
    - "docker run -d -P --name ${C_NAME} -e CLIENT_ID=${CLIENT_ID} -e CLIENT_SECRET=${CLIENT_SECRET} -e PRODUCT_TYPE_ID=${PRODUCT_TYPE_ID} --restart always ${CI_REGISTRY_IMAGE}:latest"<br>
  after_script:<br>
    - "docker logout ${CI_REGISTRY}"<br>
  tags:<br>
    - deploy<br>
 

TODO

Now that the image is published and the container running, we need to set up some sort of front-end. My major concern is security at this point, so I do still need to figure out that part. We don’t want random people accessing this API and submitting audio we can’t hear to control our device. It’ll probably be some client-server shared secret. I’ll go through some work on that part and make another post when it’s finished. Hackathons are meant to be down and dirty for an MVP. I at least have a container I can SSH into to issue commands now, so that’ll work for a little while to accomplish my goal. Ease of use via Slack would be the logical next step. Until next time!

Hacktoberfest: GitLab Runner

Hacktoberfest is upon us! This month I’m hacking on small projects each week and sharing them.

We Continue…

Last week, my son and I recently ventured out to start a Minecraft server as part of Hacktober fest. This week we are planning on automating that server a bit more. A few days after playing on the server, we restarted it to test things out. Ultimately, this did work and the server came back up, but the world data was not saved and we had no backups. Thinking out loud, we brainstormed both why this happened and how we could prevent it in the future. We certainly don’t want to build an awesome structure then lose it when the server restarts! Backups were definitely in the back of my mind, as were persisted version-controlled configurations for the server (currently after restarting, all the settings are reset to the defaults). So we set about trying to find a backup solution.

Sounds Simple

We definitely wanted to automate backups. After reading a lot about how Minecraft saves files, we knew the backup was rather simple:

save-off
save-all
tar czf /opt/backups/$(date +%Y-%m-%d)-mc-${CLIENT}.tar.gz /opt/minecraft/
save-on

Sounds simple enough right? Wrong! These commands are all sent the Minecraft server from an RCON client. A quick search finds a lot of options! So far, so good. Since the Docker image we were using for Minecraft included an RCON client… but it didn’t really do backups. At least, not the way I wanted to. So, we decided to create our own Dockerfile for our Minecraft server!

DIY

After much searching we found a very simple and very compact Minecraft RCON client written in Go! Why not? There are no dependencies on a VM or additional libraries. This should be dead simple to include in our Minecraft Server Dockerfile. Of course, as are many things that seem simple, it was not as simple as we originally thought. In our build automation, we included a stage called “setup” running on the latest Golang image. Then we simply run a script to go get and go install the Go application. We used the artifacts instruction to share this compiled binary to the next stage which copies it to our Minecraft Server Dockerfile. Now we have an RCON client!

We wanted backups to happen automatically, so we added a backup script. This script runs using Cron to periodically backup the Minecraft Server files and copy them to a backups directory. The idea here is to mount a volume to this directory so it can be used in another container (the one that will ultimately move it to Dropbox). Once we got that set up we ran the pipeline and…

It failed… The custom GitLab Runner image I had hobbled together a few months ago wasn’t working as expected. It wouldn’t pull the Golang image, so we couldn’t get the Go binary. I had been experiencing many problems with this image and was sure I probably made it wrong. I at least didn’t make it in a repeatable fashion. I definitely didn’t have it running in a container… So, we decided to shift our focus to making a new GitLab Runner image in the way I had intended — in a repeatable fashion preferably containerized. So we spun up a new repository to build this container…

With automated deploys in mind, this should be relatively easy. We created a new .gitlab-ci.yml file and had the job run in a docker:latest container (ie: Docker-in-Docker). All this job is going to do s pull the latest GitLab Runner image, configure it, then run it. Let’s see how this works:

image: docker:latest
variables:
  DOCKER_DRIVER: "overlay2"
script:
  - "docker pull gitlab/gitlab-runner:latest"
  - "docker run -d --name gitlab-runner \
    --restart always \
    -v ${GITLAB_VOLUME}:/etc/gitlab-runner \
    -v /var/run/docker.sock:/var/run/docker.sock \
    gitlab/gitlab-runner:latest"
tags:
  - docker

We push and.. wait a second.. before we push let’s walk through this… We want GitLab to automatically deploy a GitLab Runner… This isn’t repeatable. If I were to tear down the current GitLab Runner, this would never run! This can’t be the solution.. let’s take a step back…

We know we want this automated. The first time we run it, there won’t be any automation at all! We can’t use the YAML file! We must use a Shell Script (or some other script)! Let’s take a look at what we need to do

#!/bin/bash
# If docker is not installed, go get it
command -v docker &amp;amp;amp;gt;/dev/null 2&amp;amp;amp;gt;&amp;amp;amp;amp;1 || {
  curl -sSL https://get.docker.com/ | sh
}
# Set defaults
VERSION="latest"
function usage() {
  echo "This script automatically installs Docker and runs a GitLab Runner container."
  echo " ./run.sh -t [options]"
  echo " -t, --token : (Required) The GitLab Token of the container"
  echo " -n, --name : (Required) The name of the container"
  echo " --alpine : (Optional) Use the Alpine version of the gitlab-runner container"
  exit 1
}
#Parse command line options
while [[ $# -gt 0 ]]; do
  case $1 in
    -n | --name)
      NAME="$2"
      shift # past argument
      shift # past value
    ;;
    --alpine)
      VERSION="alpine"
      shift # past argument
    ;;
    -t | --token)
      TOKEN="$2"
      shift # past argument
      shift # past value
    ;;
    *)
      usage
    ;;
  esac
done
if [ -z ${TOKEN} ]; then
      echo "Token is required!"
      usage
fi
if [ -z ${NAME} ]; then
      echo "Name is required!"
      usage
fi
# Create a volume that will persist
docker stop -t 0 ${NAME} || true
docker rm ${NAME} || true
docker run -d --name ${NAME} \
  --restart always \
  -v /var/run/docker.sock:/var/run/docker.sock \
  gitlab/gitlab-runner:${VERSION}
#Register with GitLab
docker exec ${NAME} gitlab-runner register \
  --non-interactive \
  --executor "docker" \
  --docker-image alpine:latest \
  --url "https://gitlab.com/" \
  --registration-token "${TOKEN}" \
  --name "${NAME}" \
  --docker-privileged \
  --tag-list "docker" \
  --run-untagged \
  --locked="false"

There. Now we have a script that can take a container name and your GitLab Runner token then spawn a new docker privileged container. I decided to not mount a config volume as it would continuously add new runner configs when the service restarted. There is a bit of cleanup in GitLab under the CI/CD runners section when a runner is restarted, but that seems to not be a big deal at the moment. Now that we have a new repeatable GitLab Runner up, we can try to get that Minecraft Dockerfile working next time!

Hacktoberfest!

Hacktoberfest is upon us! This month I’m hacking on small projects each week and sharing them.

Minecraft

This week my son and I hacked together an auto-deployed Docker based Minecraft server that is also automatically backed up and uses Git for managing server configurations. We haven’t finished the auto-backup to Dropbox portion yet, but that’s something we can always work on later! Here’s what we did…

Continuous Integration & Continuous Deployment

I knew I wanted this server to be a “set it and forget it” type of server. If anything went wrong, restarting it would fix it without losing world data. With this in mind, my first thought was using GitLab‘s CI/CD process and a .gitlab-ci.yml file. Looking through the Docker registry, I found a Minecraft server image that appears to stay up to date: itzg/minecraft-server. We simply used that and mounted a few volumes for version controlled configs and the world data directory. The GitLab Runner file is a lot to take in if this is the first time seeing this type of file. I’ll walk through each line and explain what it does. Here’s it is:

cache:
  key: "$CI_REGISTRY_IMAGE-$CI_COMMIT_SHA"
  untracked: true
stages:
  - deploy
deploy-prod:
  stage: deploy
  image: docker:latest
  only:
    - "master"
  variables:
    DOCKER_DRIVER: "overlay2"
  script:
    - docker pull itzg/minecraft-server:latest
    - docker stop minecraft || true
    - docker rm minecraft || true
    - docker run -d --name minecraft -p 25565:25565 -v minecraft-world:/data/world -v minecraft-config:/config -v minecraft-mods:/mods -v minecraft-plugins:/plugins -e EULA=TRUE --restart always  itzg/minecraft-server
    - docker cp ./config/* minecraft:/config/ || true
    - docker cp ./data/* minecraft:/data/ || true
    - docker cp ./mods/* minecraft:/mods/ || true
    - docker cp ./plugins/* minecraft:/plugins/ || true
    - docker restart minecraft || true
    - docker pull janeczku/dropbox:latest
    - docker stop -t 0 minecraft-backup || true
    - docker rm minecraft-backup || true
    - docker run -d --restart=always --name=minecraft-backup -v minecraft-world:/dbox/Dropbox/minecraft-server/data -v minecraft-config:/dbox/Dropbox/minecraft-server/config -v minecraft-mods:/dbox/Dropbox/minecraft-server/mods -v minecraft-plugins:/dbox/Dropbox/minecraft-server/plugins janeczku/dropbox
  tags:
    - docker

Devil is in the Details

cache:
  key: "$CI_REGISTRY_IMAGE-$CI_COMMIT_SHA"
  untracked: true

Lines 1-3 relate to GitLab and Docker Container caching. This will cache the resulting image to the GitLab Runner cache with the key on line 2. This is useful for downstream builds. I copied this from another project (Hacktoberfest!) so, I’m not sure if they are needed since this container isn’t used by any other job.

stages:
  - deploy

Line 4 defines the stages that will be used during this pipeline and line 5 is that stage. We define only the “deploy” stage as we aren’t performing any testing or other delivery stages. This is useful to define for organization within this file and allows you to introduce pipelines later. Again, this may not be necessary since it’s not involved in more than one pipeline. I did copy this from another project to reduce the amount of time spend recreating it so… Hacktoberfest!

deploy-prod:
  stage: deploy
  image: docker:latest
  only:
    - "master"
  variables:
    DOCKER_DRIVER: "overlay2"
  script:
    - docker pull itzg/minecraft-server:latest
    - docker stop minecraft || true
    - docker rm minecraft || true
    - docker run -d --name minecraft -p 25565:25565 -v minecraft-world:/data/world -v minecraft-config:/config -v minecraft-mods:/mods -v minecraft-plugins:/plugins -e EULA=TRUE --restart always  itzg/minecraft-server
    - docker cp ./config/* minecraft:/config/ || true
    - docker cp ./data/* minecraft:/data/ || true
    - docker cp ./mods/* minecraft:/mods/ || true
    - docker cp ./plugins/* minecraft:/plugins/ || true
    - docker restart minecraft || true
    - docker pull janeczku/dropbox:latest
    - docker stop -t 0 minecraft-backup || true
    - docker rm minecraft-backup || true
    - docker run -d --restart=always --name=minecraft-backup -v minecraft-world:/dbox/Dropbox/minecraft-server/data -v minecraft-config:/dbox/Dropbox/minecraft-server/config -v minecraft-mods:/dbox/Dropbox/minecraft-server/mods -v minecraft-plugins:/dbox/Dropbox/minecraft-server/plugins janeczku/dropbox

Line 6 defines a new job called deploy-prod and is only deployed during the deploy stage we just defined and only for the master branch (line 9 and 10). This will spin up a new docker container using the latest docker image (line 8) from the Docker registry. Once spun up line 11 defines environmental variables available to the container and line 12 sets the DOCKER_DRIVER. This driver is supposed to be more efficient. Again, this was copied from another project and I haven’t had any problems, so I leave it alone. Lines 13-26 are the meat and potatoes. The script section does the heavy lifting.

  script:
    - docker pull itzg/minecraft-server:latest
    - docker stop minecraft || true
    - docker rm minecraft || true
    - docker run -d --name minecraft -p 25565:25565 -v minecraft-world:/data/world -v minecraft-config:/config -v minecraft-mods:/mods -v minecraft-plugins:/plugins -e EULA=TRUE --restart always  itzg/minecraft-server
    - docker cp ./config/* minecraft:/config/ || true
    - docker cp ./data/* minecraft:/data/ || true
    - docker cp ./mods/* minecraft:/mods/ || true
    - docker cp ./plugins/* minecraft:/plugins/ || true
    - docker restart minecraft || true
    - docker pull janeczku/dropbox:latest
    - docker stop -t 0 minecraft-backup || true
    - docker rm minecraft-backup || true
    - docker run -d --restart=always --name=minecraft-backup -v minecraft-world:/dbox/Dropbox/minecraft-server/data -v minecraft-config:/dbox/Dropbox/minecraft-server/config -v minecraft-mods:/dbox/Dropbox/minecraft-server/mods -v minecraft-plugins:/dbox/Dropbox/minecraft-server/plugins janeczku/dropbox

Line 13 defines what will run on the GitLab Runner. This is the reason we use the latest docker image on line 8. The commands on lines 14 through 26 will actually leverage Docker on the GitLab Runner and manipulate docker containers. We start off on line 14 by pulling the itzg/minecraft-server image (in case Minecraft server releases an update). This updates the image that Docker can use but doesn’t update the running container. After we pull the latest container image, we stop (line 15) and remove (line 16) the current running Minecraft server container. The || true guarantees the execution will not return an error which would stop this from succeeding in the event the container isn’t running or doesn’t exist. Line 15 doesn’t have a timeout for forcing the container to shutdown so it will wait to clean up and prepare the world for the server going down. This helps prevent data corruption. Line 16 removes the running container so we can re-deploy with the latest version.

    - docker run -d --name minecraft -p 25565:25565 -v minecraft-world:/data/world -v minecraft-config:/config -v minecraft-mods:/mods -v minecraft-plugins:/plugins -e EULA=TRUE --restart always  itzg/minecraft-server

Line 17 does a lot. It runs a container named Minecraft (--name minecraft) as a daemon service (-d) and binds the host port 25565 to the container port 25565 (-p 25565:25565). Since Minecraft clients check for this specific port, I opted to just bind the public exposed port to the same container port. We then mount several Docker volumes with the -v flag. I like to think of a Docker Volume as a flash drive. It’s just a storage device you can plug into other containers. The only difference is that you can plug it into multiple containers simultaneously and you can mount it to a specific folder. Here, we mounted the minecraft-world volume to the /data/world container directory. We also mount the minecraft-config to /config, minecraft-mods to /mods and minecraft-plugins to /plugins. Once these mounts are in place, we set the container EULA environment variable to true, set the container to always restart if it goes down, and finally tell Docker what image to use for the container. This runs the actual container and the whole server spins up performing any startup tasks before the server is live and available for connection!

    - docker cp ./config/* minecraft:/config/ || true
    - docker cp ./data/* minecraft:/data/ || true
    - docker cp ./mods/* minecraft:/mods/ || true
    - docker cp ./plugins/* minecraft:/plugins/ || true
    - docker restart minecraft || true

Once this container is running, we copy version controlled files (if any) from the checked out repository into the mounted volumes on the Minecraft server container (lines 18-21). This lets us version control configurations, plugins, and mods and auto-deploy them to the server. Once these are in place, we restart the container one more time (line 22) for these to take effect. These files are copied in this way so we don’t have to worry if this is the first time the container is ran. If we mounted the files before starting the container, the container wouldn’t exist on the first run and would require 2 deployments for these changes to take effect.

    - docker pull janeczku/dropbox:latest
    - docker stop -t 0 minecraft-backup || true
    - docker rm minecraft-backup || true
    - docker run -d --restart=always --name=minecraft-backup -v minecraft-world:/dbox/Dropbox/minecraft-server/data -v minecraft-config:/dbox/Dropbox/minecraft-server/config -v minecraft-mods:/dbox/Dropbox/minecraft-server/mods -v minecraft-plugins:/dbox/Dropbox/minecraft-server/plugins janeczku/dropbox

Lines 23-26 are backup related. Line 23 updates the local version of the janeczku/dropbox:latest image. Lines 24 and 25 should look familiar. These stop and remove the existing container while guaranteeing success if the container is already stopped or doesn’t exist. Line 26 should also look familiar. Here, we start another container as a daemon (-d) that restarts whenever it stops (--restart=always) named minecraft-backup (--name=minecraft-backup) with a few volumes mounted to the container. These volume mounts should also look familiar! We mount the same volumes here as we do the Minecraft server so this container can periodically back up the contents of the volumes to Dropbox. We are still troubleshooting why this isn’t quite working and hope to have this resolved next time.

  tags:
    - docker

Finally, likes 27 and 28 tell GitLab what GitLab Runner to run this job on. Each GitLab Runner may have tags that jobs can use to run on specific runners. This particular job requires a GitLab Runner that is Docker enabled. This doesn’t actually mean there is a Docker enabled GitLab Runner available, but in my case, I have already set up a Docker enabled GitLab Runner and I can force jobs to use it by adding this tag to this file.

That’s it! Now we have a Minecraft server! Even without the Dropbox backups, this project was fun. It was an awesome moment when my son wanted to stand up a Minecraft server and actually stayed interested through the build. He got to see behind the scenes how the game is set up, although I don’t think he fully understands how it all works, but maybe one day!

We will continue tinkering with this script as we add configuration files and get the Dropbox backups working. I will be open sourcing this when we have completed working on it. Until then feel free to use this as a template for your next Minecraft Server and I will be updating this post as I update the files.

Reset

Begin Anew

I recently wiped my hosting server since I was closing down my computer repair business. It always bothered me that I was only hosting one site on a rather large server and I couldn’t do much with it without risking downtime (not that it really mattered given so little traffic). When I shut it down I had a clean slate.. why not try out hosting with Docker? Not knowing much about it, other than some basic commands, a general idea what it is, and some experience at work, I dove in.

Containment

At work I deploy a whole bunch of microservices each in their own container to a local docker host on our development machines for testing/developing. There’s a whole Continuous Integration/Continuous Delivery (CI/CD) pipeline that each Github repo is hooked into that builds a Docker container configured to run the application then unit tests before publishing the Docker container to the private Docker Registry. The CI/CD system is triggered after this to actually deploy it to various environments. If any of these deployments fail, the deploy stops and the team is notified in Slack. Pretty sweet setup since I don’t have to do anything to actually deploy any changes. Just merging a branch to master kicks off an automatic deployment. They are running some sort of cluster that provides fail-over and load balancing… but I don’t quite think I need that… yet. So, knowing what I already know about Docker I set out to deploy this website as a container! Being a lazy developer, I leveraged existing Docker images on the public Docker Registry. Since I am familiar with WordPress, and there is a Docker image with WordPress already set up I went with that. For storage, WordPress needs a MySQL database which exists on the Docker Register. I use those and we’re all done here, right?

Configurations

Not so fast. We still need to actually set up the MySQL and WordPress containers to talk to each other. By default, each container runs in isolation. Nothing is exposed so nothing can access the container. This is great since we’re not quite ready for internet traffic. So I wrote a Dockerfile that builds the vanilla WordPress container to link the MySQL container on a private network. Now that WordPress and MySQL can talk to each other, we still need to configure MySQL and WordPress on the application level. We’re done with the container so, it’s time to hit the configs! MySQL setup is rather easy. Log into the MySQL container, create a username and password and you’re done! For WordPress, there’s a lovely little wizard the first time your hit your website that lets you set it up through a convenient user interface. After creating the username and password on MySQL, I hit the site and walk through the WordPress setup wizard. Once I finished with the wizard I’m done setting up the website!

Wrap-up

In another post, I’ll explain the CI/CD portion of how I accomplished making this repeatable. I did end up automating the MySQL setup so it auto-generates a username and password (of my choosing) when the Docker container is created. Additionally, I made this whole process repeatable and connected it to the GitLab CI/CD system to make it automated. My #1 goal was to make this repeatable and automated so if I ever need to do something like upgrade my server or move hosts, I’d be able to regenerate the site in it’s current state with the push of a button (or at least a few simple steps).