Strong Opinions, Weakly Held

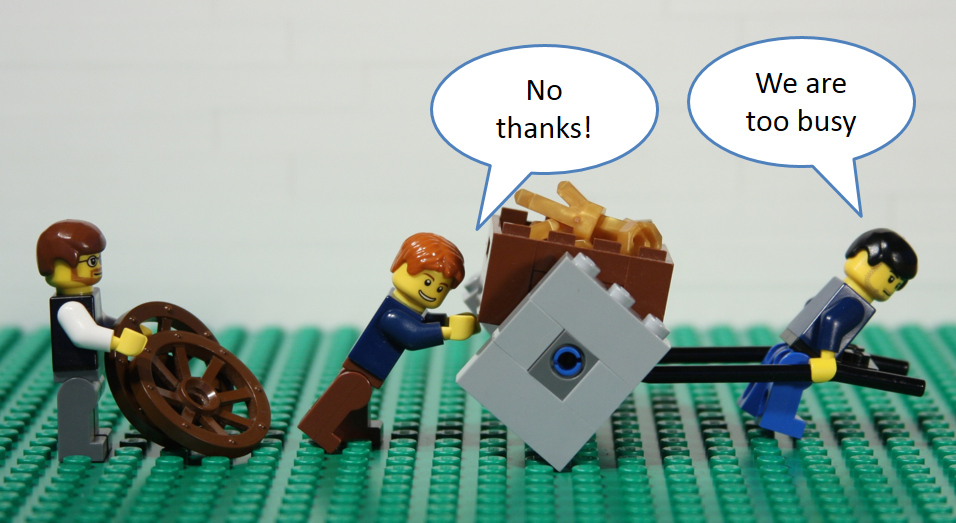
I believe in three core values to any successful team and/or project: communication, collaboration, and transparency. Communication is a key aspect to successful teams because it keeps everyone involved. Communication drives ideas. Ideas are the seeds of change and communication gets them planted. Collaboration brings the seeds of ideas to growth. Teams that are not collaborative suffer from infighting and become unproductive and resentful of a project. Team members want to be part of a solution and collaboration is the vehicle everyone must ride in to reach success. Transparency is the last leg of a successful team. Transparency requires both communication and collaboration. Transparency requires each individual team member to know the difference between what they do know, and what they need to learn. Team members who are transparent in their skills ask a lot of questions. The answers to these questions are often helpful for other team members as well. Transparency is also about owning mistakes, addressing them, and learning from them. Every failure comes with an opportunity to learn. One never really fails if they seize the learning opportunities afforded by failure and grow from them. These three core values I hold are what I instill in my teams.

Recently, during an interview, I brought up these core values and followed up with a quote I feel expresses not only these three values, but my thoughts on being a team member: “Strong opinions, weakly held.” This can also be rephrased as “Strong opinions, loosely held” and they both mean the same thing. I bring strong opinions to a team backed by experience and learning through many failures. Learning from these failures strengthens particular opinions, but they still remain loosely held. These opinions are meant as a starting point for collaboration or as a learning opportunity for myself and any others who may not have experienced what brought about these opinions. These opinions are meant to inspire creative thought and collaboration, not as a rule of thumb or “set in stone” requirement. These opinions are loosely held.

The flexibility of a team is important to adapt to changing requirements, processes, deadlines, and outside obstacles. Rigidity is a project slayer. I may have strong opinions on a topic (say, using a REST API vs an unstructured one) but these opinions are meant as a conversation starter to discuss a solution to a relevant problem. This conversation solicits input from the members of the team. It provides a platform for other opinions and a better solution. Sure, that solution may be an unstructured API, and that’s okay. But, the point of bringing up strong opinions is to start that conversation, not lay down the law. If there wasn’t at least a conversation about API design (or any other implementation) in the first place, the team could move forward in a rather meandering manner. The project could take an intangible hit to be discovered later as it accumulates technical debt. Communication about a project direction reduces this debt and lets a project be more flexible during a time where flexibility comes easy.

In the interview, I failed to accurately describe “strong opinions, weakly held.” This article is me learning from that failure and really taking the time to think about that phrase and how it can be perceived by others. When I came across the phrase it resonated with me as it so succinctly underlined my core values of communication, collaboration, and transparency. To me, it’s a positive attribute to have. Using that particular phrase became a strong opinion of mine. Maybe in the future I won’t use this phrase without following up with exactly how it aligns with my core values and what I look for in a team. The only thing I know is that I don’t know everything and I am definitely open to learn. I have strong opinions for sure, but they are loosely held.

Version Control

Version Control

I’ve been working as a software engineer for over a decade. In my time I’ve worked on projects that had version control in place and projects that had no version control. While I believe all projects should use version control, I have come across some projects that don’t see the benefits or value. This article aims to highlight the benefits and value from using version control and the pitfalls of no version control.

What Is It?

First, what is version control? It’s essentially a library for your code with a specialized database tracking all changes to any file. This type of tracking provides insight into your code in terms of changes, thoughts about changes in the form of comments, and overall visibility into how your code changes over time. It also allows using your entire code base at any single change. This becomes helpful if a breaking change is introduced to your code, you can always roll back to a previous version. It also helps your developers identify the exact change that introduced a bug.

Why Use It?

As mentioned, it does provide some innate capabilities like rolling back to a previous version and viewing changes to code. It also handles complicated code merges in the event 2 people change the same code. This type of code merging makes things easier and faster over teams that do not utilize version control systems. Take an example I’ve experienced in the past during my early years as a software engineer:

The team was small (3 people) and the project was simple (a simple website). This was the days of FTP clients and deploying your website was accomplished by drag-and-drop to your web server. Simple. Easy. Clean. Right?

Well, with 3 developers we decided that the web server would be the stand in for the most current version of the website (after all, it’s what everyone on the internet was looking at). Things immediately became more complicated. If a developer was working on something, they first needed to copy the files from the web server to their local machine, make their changes, then copy the files back to the web server. Hopefully no other changes were made in the meantime. When changes were made (and the most definitely were) the developer would have to copy the files from the web server (again) back to their local machine (in a different folder), talk to the developer (or developers) that made changes to figure out what they changed, and manually merge changes in those files affected (timestamps definitely helped). When that was all done, they would have to the web server again for changes. Sometimes, more changes were present and the whole process of copying, talking, and merging needed to occur again. This cycle repeated itself until the timing of being ready to copy to the web server and no changes on the web server aligned. This could take a few hours.

We were naive of version control systems at the time. Once we discovered one (Subversion in this case) it made things infinitely easier. Developers would check out the main branch of the repository, make their changes, then check them in. Merging happened automatically most times unless 2 developers were working on the same code. In this case, the source control manager would present the conflicting changes in an easily readable visual manner and allow the developer to pick and choose what the final file would be. After this merge, the developer could test the changes before committing everything back to the repository. If a developer made changes before the commit was ready, the source control manager knew and the developer would update their code from the repository. Again, merges generally happened automatically at this point, but in the rare case a conflict would arise and the visualizer would present this conflict to the developer. This cycle rarely happened because the whole process was fast, easy, and efficient. When a deployment was ready, a tag was made in the repository and that specific tag was checked out on the web server. No file copies were made any more, no FTP clients were involved, and everyone knew exactly what was on the web server at any given time and if any of the files on the web server had changed.

Wrap Up

I find version control systems a necessity for a successful software development team both in terms of efficiency and cost. Less time working on frivolous things equals less money spent! If a team insists on not using a source control manager, maybe that team hasn’t yet experienced anything negative impacting their development efficiency. I use source control for all of my projects regardless of team size. It’s beneficial for a team of 1 just for the ease of code tracking and visibility into bug introduction. If you’re not using source control, I strongly urge you to adopt it!

Server-Side vs Client-Side Trust

Server-Side vs Client-Side Trust

I like to pretend I’m an avid gamer. I try to keep up with the latest gaming trends, well.. at least I try to. I have a few games I typically go to, and a few games I am excited to play once they release (and I wait until a sale, or until they’ve been out long enough that the price drops… I am an adult with responsibilities after all…). I’ve played some games that are great (like Diablo III) and some games that are great in concept but lacking in execution (like Tom Clancy’s: The Division). My go-to games are generally networked and have other players playing them either in a cooperative or adversarial capacity. There are some games, however, that draw more hackers to than others. Why is that? This article is an attempt to explain the exploitation practices of these so-called “hackers” and their drive behind their exploits.

First, before we talk about how “hacking” works, we should set up some basics of network based game play. There are many methods of accomplishing this type of play I’d like to discuss with the pros and cons of each

Peer-to-Peer

Peer-to-peer, sometimes referred to as P2P, is exactly as it sounds. One player is the physical host of a game and other players make connections to the host. In this type of networked gaming, the host has an advantage when it comes to latency (aka lag). The inputs from the host have a latency of 0 while all other players have a latency based on the connection speed of the host player.

The pros of this type of networking is the easy of use. It doesn’t require any specific setup or resources for a player to host a game. It also does not require the gaming company to establish and maintain any dedicated servers. Many console games typically use this type of setup as the network demand is low and the games are typically casual.

Dedicated Server

Dedicated servers are hosted game servers that are specifically build to host a specific game. In games that use this type of connection, all players connect to the dedicated server and all player’s latency is based on their individual connections to the hosting server. Typically, the dedicated server is geographically positioned close to an internet backbone. This type of server is generally used for more competitive play (like Overwatch, or Counter-Strike) and can be set up in a local LAN environment for offline play.

Cloud Hosted

Cloud hosted servers are rather new to the gaming industry. These types of servers are typically allocated on-demand for a particular game and are shut down after the game resolves. This reduces the overall cost of a company for having dedicated servers as the capacity for players expands and contracts with demand. Games that utilize this type of server generally have a match-making system that finds and groups players, allocates a new server, then loads the players on the server. As technology expands, this type of gaming server is likely to become more adopted for many games.

Building Trust

With any game comes some level of trust between players. For video games, this trust can be enforced by the server hosting the multiplayer game or by the game itself. Server-side trust is generally the most trustworthy: commands come in from each player’s game, are validated, then the game state is updated and sent to each player’s client. Client-side trust, however, is more untrustworthy as the server assumes the commands it receives from each client are true and no validation is performed.

Server Side Trust

In Server Side Trust, when a command is received from any player’s client, it is validated against the rules of the game and the game state. If a player’s client sends a fake command “Player A shot Player B on the other side of the map and did a million damage” this is logically checked against the game state (Is Player A in range of Player B?) and the rules of the game (Does the weapon Player A uses allow a million damage?). If any of the commands violate the game state or game rules, the command is either ignored or flagged as suspicious. If enough suspicious commands are flagged for a player, that player could be banned from the game as it indicates cheating.

Client Side Trust

In Client Side Trust, when a server receives a command from a player’s client, it is regarded as the truth. If, somehow, a fake command is sent from a client (say, “Player A shot Player B on the other side of the map and did a million damage”), the server trusts this command as a true and accurate command, updates the game state, then relays the state to each player’s client. The result to Player B would be that they just suddenly were killed by Player A. This is obviously a problem. Client side trust assumes the game client is secure and extra steps are necessary to ensure client is not modified and the messages sent to the server are the original. In transit communications can be protected through encryption, provided the encryption is one-way and messages cannot be intercepted before or after decryption (very unlikely).

Never Trust the Client

There’s a saying in software development: “Never trust the client.” This does not refer to a person, but rather a consumer of server-side processes. Be it a web application, game client, or anything else processes transactions with a central (or distributed) server. Client side trust is inherently insecure. Server side validation is always required when communicating with a third-party (in this case a client application). This validation is crucial to ensuring the integrity of the system as a whole. Once validation breaks down, which is most likely will in very creative ways, recovering from this becomes easier if the server is already validating incoming messages against the rules of the system. Assuming everything that comes into a server side system from a third-party client is an attempt at breaking the system is a heavy-handed approach, but will reap major benefits as the system grows. Having a validation system in place to thwart adversarial communications will always provide benefits for your trustworthy clients.

In The Wild

Now that we all understand the different types of network based systems, let’s take a look at real world applications, how they are built, and the effects of the architecture of these systems.

Tom Clancy’s The Division

This game is build with client side trust as a benefit. There are trade-offs for this, of course, but an unfortunate side effect is that the game client or the traffic the game client is sending to a server can be manipulated. This particular game does have a lot of computational complexities, including world state and physics. These complexities would need to reside on the server if server side trust were to be leveraged. This, in turn, becomes expensive. Having a server powerful enough to model the physics of enemies and the world (which has a large interactive part in game play) becomes almost cost prohibitive. Ubisoft’s approach to Tom Clancy’s: The Division was to enable client side trust from the beginning of development. This allowed the development team to quickly deliver a working (and beautiful!) game to their customers. As a side effect, the game is rampant with cheaters in the PVP areas where competition is high. In this case, the negative cost of cheaters in a PVP area affected a smaller base of their customers as the PVP area was opt-in. The positive benefits involve very complex processes run on each player’s platform (PC, console, etc.) and reduced the cost of server hosting for the game. As a partial list of computations the server would need to validate from each client:

  1. Enemy position, inventory, and state (fire, poison, bleed, etc)
  2. Player position, inventory, and state
  3. NPC position, inventory, and state
  4. Projectile information (bullet drop, grenade location, damage, etc)
  5. Objective information (for each player connected)
  6. A. WHOLE. LOT. MORE.

This becomes cumbersome is a vast game like Tom Clancy’s: The Division. It also would require a lot of changes to the game client if the game were to switch to server side trust. The server would have to maintain the entire game state with each message from each client. It would also eliminate the unique aspect of Tom Clancy’s: The Division where each player has their own world in it that has it’s own state. This allows a player to join another player’s game (in a completely different state) and help them in their quest line. This also enables a changing world where certain impact on a player’s world permanently changes the world somehow. World of Warcraft accomplished this in their many expansions, but the calculations for combat in World of Warcraft and the overall computations required are minimized and streamlined for server side trust.

World of Warcraft

Possibly the best example for server side trust is World of Warcraft. This game is very light on many aspects while still immersing a player into the world through rich lore. The game itself is broken into different servers with a maximum capacity for players. Each area within any given server is then broken up into smaller worlds. Each of those worlds are broken down further into smaller areas. This is called server sharding and helps balance the overall load of any sharded area based on population. This sharding is also why some of the characters you see in a major city disappear when they leave the city: they are migrated to a different server shard. It also explains when you enter an area after an event and that area is changed: you’ve moved to a typed shard based on your quest progress.

Aside from sharding, there isn’t very complex battle calculations. There is no bullet drop, there is no projectile pathing, there is no enemy inventory (enemy loot drops are calculated at the time of enemy death based on loot tables). The entire game has been developed for server side trust and some sacrifices were made to accomplish this. These sacrifices were made up for through rich storytelling and an immersive world.

Player Unknown’s Battlegrounds

Another popular and competitive game that uses client side trust. This particular game has accumulated many cheaters due to its competitive nature. Among the things that have client side trust within the game client are:

  1. Inventory
  2. Hit Detection
  3. Collision
  4. Ammo
  5. Health
  6. Momentum

Any one of these things could be replaced with a message indicating another value. If I sent a message saying I just picked up the best gun in the game, I’d have the best gun in the game conjured up out of thing air. I could also send a message indicating I hit a player anywhere on the map and that player would take damage. This game has recently adopted Easy Anti-Cheat as a measure to prevent tampering with the client side trust. This works by providing a middle layer between the application itself and any process interacting with it. It verifies the integrity of data before sending it to the server and flags any suspicious messages. It also monitors processes that would tamper with the game client and also flag these actions. Enough flags and Easy Anti Cheat notifies the game company who can later ban the player. This effectively moves server side trust to a client side layer while also not being part of the client itself. This type of middleware is currently a better solution for applications with client side trust than rewriting or introducing server side trust.

Wrap Up

Competitive games are generally the target of cheaters and many of them opt for client side trust for the low traffic latency and increased complexity of algorithms. The only solution for applications with client side trust that require a level of integrity are the middleware applications that monitor the application process and any interactions with the process. This is not entirely fault proof, but does offer a greater deal of protection for other players against cheaters. But, as with anything that gives someone an edge in a competition, if there’s a will, there’s a way.

Efficiency

Efficiency

I am a fan of efficient processes. When I see potential for process improvement, I find myself drawn to making it better. I’ve done this in a past company I worked for when they did not have a proper defined software development life-cycle. I developed a process within my own teams that I though was better. It certainly felt better than “could someone build this deliverable on their machine and email it to the delivery guy?” Nothing was repeatable. Nothing was automatic. Nothing was tested unless someone remembered to test it. And nothing was guaranteed to work. Sound scary? It was. My proof of concept that I would eventually pitch to the company at large revolved around automation. Automation at this company meant a few upgrades.

The company was on Subversion at the time and this new thing called Git was around that everyone else was using and everyone else found it was better. In one afternoon I copied one of the projects I was leading and converted it to Git while retaining all the history. It was easy to convert. It was certainly faster than I was expecting given how slow Subversion is. And it was simple. I find Occam’s Razor to be a great mediator when arguing with myself. The simplest solution is often the right one. Switching to Git opened up a lot of doors for faster development without the feared SVN Merge Conflict (which happened multiple times a day). Git seemed more efficient in the use of my team’s time. I was sold on Git. My team was sold on Git before I even installed it. How could I get the company to upgrade? I had to show them how awesome it was.

Next up was not having to ask my developers to build a deliverable. If there’s one thing I’ve learned about the inefficiencies of doing anything manual, human error is that thing. Human error exists and can never, ever, ever be mitigated without completely removing it. Jenkins to the rescue! I’ve set up Jenkins in past jobs before so setting it up for a proof-of-concept was not big deal. About 10 minutes later it was up and running on my local computer along side the Git server (I know, I know, bad form! This was before containers people!). Having Git tell Jenkins that a thing was changed was easy. Almost too easy. A few manual builds to work out kinks in the Jenkins build then a few configurations on my local Git server and viola! The Git server was talking to the Jenkins server and a tag triggered a Jenkins build which stored the build artifacts indefinitely. Now, when we wanted to show something, we just cut a tag! (I would later expand this to an automated deployment, but this was a proof-of-concept that I need so I could change a company’s process).

My teams use this process for a few weeks tweaking things as we came across it. We knew (yes by this time the entire team was on board with the new way since it saved so much time) that we only had one chance at this pitch. After a few weeks I ran it by another team local to my office. They wanted in before I had finished the first sentence before I could ask if their team wanted in as a guinea pig. They were on it within an hour.

Some times it is better to ask forgiveness than permission. In this case, I asked for a dedicated VM (again, before containers!) located in HQ for my project. I got one after about 2 weeks and started migrating Git and Jenkins to it. Once we were migrated everything was going great! We had buy-in from the entire local office and things seemed to be going well with this out-of-control proof-of-concept-turned-beta project. Interestingly enough, productivity had increased enough that all this non-project-specific work was never noticed. I’m not saying you should go rogue, but I definitely should have pitched this sooner than I did. By this time, I asked for a meeting with the CTO and other Lead Engineers. After we figured out a time we could all be on a Skype call (migrating to Slack is a story for another time) I showed them what we were working on. I showed them Git. I showed them Jenkins. I showed them the entire process from new repository, through the Git Flow branching pattern, to first automated build. Boy am I’m glad this was a Skype call. After the initial “you shouldn’t have done this without permission” speech came the “I’m glad you did though.” They definitely liked what they saw. In my defense (and I believe everyone else in my local office at this point) we had tried to get continuous integration up and running but were continuously shot down. I felt like the poor guy behind the cart in this picture:

If you find yourself slowed by processes, think about how you can improve them!

So, the IT team in HQ took over the project and I walked them through some of the setup for Git and Jenkins. They, of course, made improvements (LDAP authentication, separate VMs, etc.) when they installed Git and Jenkins.

So, after about 2 months of this entire process, the company had adopted Git and Jenkins for a better solution. Teams were starting to migrate to Git and learn the Git Flow branching pattern. Everything was looking up! It sparked a bit of an overhaul to other processes and happened to fall right in line with their CMMI Level 3 efforts (more on that in another post). Everything seemed right in this process — everything was much more simple.

I’ve learned a lot from this experience. For my own projects I have my Git repositories hosted on GitLab. It uses a build server I host on DigitalOcean. These builds are automatically deployed (within containers!) and freely available. Heck, this site has a GitLab repository with the configurations to repeat deployment. So does my Division Gear discord bot. If you ever find yourself repeatedly building the same things manually, it might be time to fix that.


Copyright Expiration is BACK!

Copyright Expiration is BACK!

Since 1998, when Disney (along with a group of other corporations) successfully convinced congress to pass an extension to the original copyright laws. The original laws state that any works created before January 1, 1978 were protected for 75 years. The change in 1998 extended that to 95 years. This is great for corporations like Disney who’s iconic character, Mickey Mouse, was first published in 1928 in Steamboat Willie. This averted releasing the character Mickey Mouse into the Public Domain in 2004. It is now scheduled to be moved to the Public Domain in 2024 and I’m sure we will see another fight similar to that in 1998 to extend copyright protection laws even further.

While these copyright protection laws protect anything that was published prior to January 1, 1978, everything published afterwards is protected for the lifetime of the creator plus 50 years. So, this article will be entering the Public Domain sometime after January 1, 2219 (hopefully later! Predicting your own death is a little morbid).

So we can rejoice that, as of this moment, anyone can publish Robert Frost’s Stopping by Woods on a Snowy Evening without fear of violating copyright laws as it is one of many works entering the Public Domain today!

Stopping by Woods on a Snowy Evening

By Robert Frost

Whose woods these are I think I know.   
His house is in the village though;   
He will not see me stopping here   
To watch his woods fill up with snow.   

My little horse must think it queer   
To stop without a farmhouse near   
Between the woods and frozen lake   
The darkest evening of the year.   

He gives his harness bells a shake   
To ask if there is some mistake.   
The only other sound’s the sweep   
Of easy wind and downy flake.   

The woods are lovely, dark and deep,   
But I have promises to keep,   
And miles to go before I sleep,   
And miles to go before I sleep.

Metrics

Metrics

If you’re reading this, chances are you’ve developed some type of toy app. Maybe even deployed a few. Perhaps you even have users that are happily plugging away with your app! But, do you know how it is performing? Do you know what your users tend to use the most? Do you know when things are failing, maybe even silently? In this article, I’m going to build a metrics stack and hook up my Discord Bot to it so I can start seeing just how much use it’s getting

The Idea

So, I’ve used Grafana at work. I believe it’s even backed with InfluxDB. We do time-series metrics gathering for successful executions of a service, when an expected failure condition occurs, and even when an unexpected condition occurs. This is great as it’s plugged into PagerDuty that has a bunch of alerts and checks against the metrics in InfluxDB. So, when something fails that’s really important at 2 a.m. I get a call from PagerDuty and I get to go to work a bit early.

Alright, so that’s an enterprise solution there. You probably don’t want your own app waking you up when a user hits an error. But, how would you even know it happened without your user notifying you? My my metrics gathering goal is to track servers the bot joins, bot departures, queries per server, queries per user, vendor cache resets, queries that return no results, and the total amount of results returned across all servers.

The Setup

Now, I could go about this and write some sort of database that’s fronted with some services and then invoke those services with my app. But, that’s a lot of work. Other people that are smarter than me have already figured this out. I’m researching a few solutions to implement. So far, I’ve found:

  1. Grafana – a metrics visualization web application
  2. InfluxDB – a time-series database
  3. Graphite – A statsd compliant time-series metrics service
  4. Prometheus – Another statsd compliant time-series metrics service that’s supposedly better than Graphite
  5. Statsd – a protocol for metrics gathering, also a tool that Esty made

I’ll be researching these more to determine what I might actually use. If I find better alternatives, I’ll be sure to write something on them as well. For now, I think I have some sort of solution with these options.

I’m hoping to also use Docker in setting this all up. Maybe there will even be a handy Dockerfile I can use that has all the things needed to get this up and running.

If you have any other suggestions, let me know in the comments! If you have ideas on what else to comment. I’ll write something about the metrics system and post it soon!

Downtime

Downtime

Recently my server went down! Well… not exactly… It did however stop serving pages with a trusted certificate. Looking into this took my NGINX container down and required some updates. So, without further ado, here’s what happened…

First Things First!

I try to be as transparent as possible. I am hosting a few other websites on my provider using containers, so I loaded up MailChimp and fired off an email to my hosts. It went something like this:

Ruh roh!

Yep, simple and sweet. Nothing too foreboding, but just enough to let everyone know their site may be down or otherwise inaccessible. Once that was fired off I started digging in!

Confident that restarting might fix it, I used localhost as the guinea pig. And, <sad trombone sound> it still had the same issues. Seemed like an NGINX issue, so I restarted that too. Still no luck. Looking at the NGINX logs I see the restart just mentioned an unknown “virtual host” environment variable. That’s weird, this only routes to virtual hosts, it isn’t one of them not does it know of any of them via an environment variable… Interesting…

Let’s Get Sleuthy

Digging into the NGINX Generator container logs didn’t show anything out of the ordinary, and the Let’s Encrypt companion container didn’t turn up any weirdness either.  So I started with the NGINX container configurations to see what was up. I went through /etc/nginx/conf.d/default.conf and found the environment variable there so it was somehow passed down to the NGINX Generator which then wrote it into the NGINX config. Thankfully (SO THANKFUL) the NGINX Generator also commented which container this configuration was written for. If you recall, I was previously working on my Alexa Bot a deploy by this project was triggered with no value for the VIRTUAL_HOST variable. NGINX Generator decided that was the literal value and passed it on the the NGINX configs. Fixing this required going outside the automated deploy pipeline. I ran a shell on the NGINX container and opened up the default.conf file again and just removed the block. Restarting NGINX still had the same environment variable issue.

Taking a look at the running containers, the Alexa Bot was still running (presumably with the wrong VIRTUAL_HOST variable). So I killed it and restarted NGINX… same error. Again I opened a shell on the NGINX container and opened the default.conf file and the VIRUTAL_HOST variable was back! NGINX Generator must have picked up a change and re-wrote the config with the Alexa Bot container values. Oops! Removed the block again and NGINX restarted just fine without the environment variable issue. Success! Let’s reboot the whole NGINX stack (NGINX, NGINX Generator, and the NGINX Let’s Encrypt Companion containers). Everything restarted just fine! Perfect!

But Wait, There’s More!

Going to localhost still had a certificate issue. But alllll the other sites worked fine. This was super weird. So, easy thing to do was to restart the container for the site! Nope. Still had an expired cert. But, this time, it was a self-signed certificate by the Let’s Encrypt Companion. Different results are good right? I took a peek in the Let’s Encrypt Companion container and there it was! I had added the IP address of the localhost server as a Virtual Host to the NGINX Generator configurations, which were then written to the NGINX configs. This works great in NGINX land. But SSL certificates are only ever issued to host names. I removed the IP address form the localhost build parameters and viola! It’s back up and running! Following up with my users, I sent an email to them that looks something like this:

Everything is awesome!

Post Mortem

The root cause of this issue was related to an unrelated build which was poorly configured. This is not a shock given it was a Hacktoberfest project. Fortunately, this was specifically isolated to the localhost hosting. Unfortunately, having to restart the NGINX container brought down all other hosted sites. This did highlight a flaw in our build pipeline for Let’s Encrypt certificates. The Virtual Host and the  Let’s Encrypt Host values were shared. Isolating each to their own variables would have prevented this issue while still retaining the NGINX handling for the raw IP address. By the time this is published, this will already be resolved, but is does serve as a reminder that configuration shortcuts can definitely cause some obfuscated problems. This particular problem lasted 2 hours, 59 minutes, and 49 seconds.

OAuth2 Explained

OAuth2 Explained

I’ve recently involved myself with the implementation of OAuth2 in my current position. During this involvement, I’ve had to read through the OAuth2 specifications and audit our system for compliance. It’s pretty cut and dry as far as compliance goes.. it either works, or it doesn’t work. Since it was working and nobody on the team understood it, I decided to document our OAuth2 flow through our system when a user attempts to access a protected resource. This proved extremely valuable for all of the members of the team to understand the entire flow. When OAuth2 related problems did arise or something needed to be tweaked this document was paramount in the team understanding the problem and addressing it quickly. We pride ourselves on going fast… We are Go developers after all.

What is OAuth2?

You may have heard of the term before, but you definitely have used it before. Whenever you sign into something using your social media account (Google, Facebook, etc.) you are most likely using OAuth2. One of the main hallmarks of using OAuth2 is granting access to some piece of information on your social media account to another service. When you decide to log into a website using your Facebook account, Facebook asks you some questions. These questions are the core of what’s important in OAuth2: delegation. These questions are OAuth2’s way of asking you “Do you trust and are you OK to share this data with that third-party over there?” Facebook is making you aware of what this third party is requesting and if you are OK with that. You can generally decide what access permissions you want to delegate to the app you are logging into and you get to see what this third party needs in order to operate. You can certainly tell if the third party is mining data if it asks for everything about you to simply log in. This is a great layer of transparency! When you agree to these permissions, you are delegating access to this third party. If you’re alarmed, you should be.

One of the many problems OAuth2 is looking to address is transparency. Knowing exactly what has access to  your data and putting that access in your control is one of the many, many, many, reasons I prefer OAuth2. When I want to revoke access, I can! I simply log into my Facebook (or whatever account I used to log in) and see what has access to my account. I can revoke access to anything I want immediately. This control is precisely why OAuth2 has become omnipresent: control of fine-grained third party access to your private data is in your hands.

Now, this isn’t necessarily the case everywhere. Some OAuth2 providers (like Facebook and Google) provide well documented OAuth2 APIs. These APIs defined the backbone of access control: scopes. Each OAuth2 authorization request includes a list of these scopes. Each scope represents pre-defined access to your account data. Some of them (like Facebook’s email) are generally benign and required as something equivalent to a username so the third party knows who you are within their own system. Others (like the Google’s `https://www.googleapis.com/auth/admin.datatransfer` scope for Google) may be used maliciously. In the case of Google, this particular scope allows the relying party to “View and manage data transfers between users in your organization.” Sounds pretty bad right? This is why you have the opportunity to review the requested scopes when granting (or denying) authorization to any third party. You get to audit permissions before granting them! What a wonderful solution! So, if you are using an app that manages your Google organization, this scope is perfectly normal. However, there is a caveat with this auditing. In some certain circumstances, scopes may not be granular enough. A single scope may over deliver in protected data.

When a non-granular scope is used, more information than the user expects is shared. This seems to be the case in Facebook’s Cambridge Analytica fiasco. Facebook has since addressed the issue, but this seems like a permissions issue related to third party access and improper scope compliance. This is all speculation, but it appears that one or more scopes were providing access to more information than they should have. This security loophole would have allowed a third party to access and mine data that was not intended to be shared, but ultimately was accessible. This particular case did not provide transparency for data access. But fear not! There is definitely something you can do about some of this!

Revoking previously granted access to third parties involves logging into your provider account (Facebook, Google, etc) and checking on existing access. For Facebook, check your Account Settings for Apps and Websites (for Google check here). You can review which sites and apps have access to your data and what they have access to. You can also see what access has expired and what has previously been removed. You should review these periodically for anything you don’t use anymore. Apps and websites you don’t use anymore may still have access to your data! Cleaning this up takes about 1 minute and helps lock down your data. While this won’t prevent data leakage (in the case of the Cambridge Analytica scenario) it will maximize protection of your account details.

Now that you know how authorization delegation works, OAuth2 makes this more secure by requiring third party websites and applications to pre-register with them. This creates a trust between the third party and the OAuth2 provider and grants extreme control to the OAuth2 provider as they can revoke ALL access to the third party by blocking their OAuth2 account. Once this trust is established, third parties are granted an ID and a Secret. These two pieces of information are heavily used in various OAuth2 flows.

As a third party, you can obtain Access Tokens in a number of ways called grants. The preferred grant flow is the Code Grant flow (detailed below). Others include Token, Password, and Implicit Grant flows. I won’t cover these in this article but you can read more about them in the OAuth2 Specifications.

Code Grant

The Code Grant. The most secure grant for all parties. This grant requires the third party to begin the OAuth2 delegation flow by requesting the OAuth2 provider begin the Code Grant flow. In this flow, the third party directs the user to the OAuth2 provider where they are prompted to log in and accept (or deny) the requested permissions (via scopes). If you look in the URL, you can see the Client ID, the grant type, and the requested scopes. Once accepted (or denied) the OAuth2 provider redirects the user back to the third party’s callback handler with an OAuth2 code. The third party must handle this code by exchanging it for an Access Token. This is accomplished by presenting the code received from the OAuth2 provider, the third party’s registered ID with the OAuth2 provider, and the secret provided to the third party by the OAuth2 provider. This proves to the OAuth2 provider that the third party initiated this call and it’s not an attempt to hijack an OAuth2 code. Once this is received and validated by the OAuth2 provider, the third party receives an Access Token and an optional Refresh Token.

A simplified view of the OAuth2 Code Grant Flow

Refreshing

The Access Token has a short life depending on what the OAuth2 provider has set. The Refresh Token generally has a longer life (around 2 weeks in many cases). This means the third party has unrestricted access to the data you agreed to provide it whenever it wants to go retrieve it until the Access Token expires (or is revoked by you security minded people out there). Once an Access Token expires (or is revoked) the third party may attempt to renew the Access Token using the Refresh Token by providing the client ID, secret, and Refresh Token to the OAuth2 provider. If access has not been revoked, a new Access Token (and optional Refresh Token) are provided renewing the life of the access. If access has been revoked, neither the Access Token nor the Refresh Token are returned and the third party is notified it is no longer authorized. If the Refresh Token is not used before it expires, then the entire access is automatically expired and a user will need to log in and accept the permissions again.

OAuth2 Refresh Flow

Refresh Tokens have a longer expiration date. Facebook’s is 90 days. On any Facebook activity for that app, the Refresh Token can be renewed. A third party could access your data every day to keep it up to date. This automatically renews the Access Token on Facebook’s servers. A Refresh Token can also be requested every day to keep that from expiring as well. I know I haven’t used Charm Farm in forever, but the access hasn’t expired yet on Facebook!

Improvements

I could see an addendum to the OAuth2 spec to increase transparency by allowing an optional expiration that can be changed by the user during the permission review page or the OAuth2 providers allowing the manipulation of the Access Token and Refresh Token expiration dates. This wouldn’t hinder the operations of an app or website, but will have the added affect of automatically expiring application access you don’t use often at the option of the user. It would also lessen the burden for requiring the user to revoke access for long forgotten apps that are still mooching personal data because they have kept up the refresh cycle. Anything free costs something. OAuth2 has made it easier to cost information. Putting more control into users’ hands is the logical next step. The best thing you can do right now to stay safe is to be vigilant. You should periodically review the access other apps and websites have to your data on all your social media accounts. This will reduce the avenues available for leaking private information.

Managed Website

Managed Website

As I had previously mentioned I recently wiped my host machine for my website. Go ahead, check out the Wayback Machine for it. From beginning to end it’s been rather static and consuming the entire purpose of a remote server. During this “reset” I wanted to more fully utilize my server. I wanted to do this using Docker and isolate any state (the database, as in this article you are reading right now) to a second storage container so that the main container is easily managed in the event things go sideways. This article explains how I did this using Docker and GitLab’s Continuous Integration framework.

Plan the Work

From the start I knew I wanted a WordPress website. WordPress uses MariaDB (or, the MySQL Community Edition) for storage. So, reasonably, I’d want a container for WordPress and a container for MariaDB to separate container responsibilities. Easily enough they already exist. So, we are going to keep the whole orchestration simple by using a single GitLab CI script. To keep things even more simple, there is only one step: deploy. This step will handle everything that is required to deploy the website as an entire solution. This entails:

  1. Create the Storage Container
  2. Create the WordPress Container
  3. Create a Backup Container with scheduled backup job
  4. Create a Dropbox Container with scheduled upload job

Trust me, it sounds way more complicated than it is. We are simply creating 4 containers and 2 volumes then doing some periodic shuffling of data.

Work the Plan

Now that we know all that we need to do, let’s automate it! Our GitLab Runner is a Shell based Runner. This means that the commands are run on the host computer and not within a Docker-in-Docker container. This lets us create and manipulate containers on the Docker host. Pretty handy for automation! Let’s focus on the script block…

Create the Storage Container

The first step in launching any container is to create it. We create the Strorage Container in 5 lines:

  - docker pull mariadb:latest
  - docker stop -t 0 ${STORAGE_CONTAINER} || true
  - docker rm ${STORAGE_CONTAINER} || true
  - docker volume create ${STORAGE_VOLUME}
  - docker run -d --name ${STORAGE_CONTAINER} -v ${STORAGE_VOLUME}:/var/lib/mysql -e &amp;amp;quot;MYSQL_ROOT_PASSWORD=${DB_ROOT_PASSWORD}&amp;amp;quot; -e &amp;amp;quot;MYSQL_DATABASE=${DB_NAME}&amp;amp;quot; -e &amp;amp;quot;MYSQL_USER=${DB_USER}&amp;amp;quot; -e &amp;amp;quot;MYSQL_PASSWORD=${DB_PASSWORD}&amp;amp;quot; --restart always mariadb:latest

On lines 1 – 3 we update the MariaDB image, stop any existing storage containers, then remove any stopped storage containers. This sets up the Docker host for creating a brand spanking new container hot off the update MariaDB image in the Docker repository. The next step (line 4) we create a new named volume. If this volume exists nothing happens. Finally, in line 5, we start a new container with the storage volume mounted it.

Create the WordPress Container

In a very similar process, we create the WordPress container. This container will simply host the WordPress installation and be configured to talk to the MariaDB database.

  - docker pull wordpress:latest
  - docker stop -t 0 ${WEBSITE_CONTAINER} || true
  - docker rm ${WEBSITE_CONTAINER} || true
  - docker volume create ${WEBSITE_VOLUME}
  - docker run -d -P --link ${STORAGE_CONTAINER}:mysql --name ${WEBSITE_CONTAINER} -v ${WEBSITE_VOLUME}:/var/www/html/wp-content -e WORDPRESS_DB_USER=${DB_USER} -e &amp;amp;quot;WORDPRESS_DB_PASSWORD=${DB_PASSWORD}&amp;amp;quot; -e WORDPRESS_DB_HOST=mysql -e WORDPRESS_DB_NAME=${DB_NAME} -e LETSENCRYPT_EMAIL=${EMAIL} -e &amp;amp;quot;LETSENCRYPT_HOST=${HOSTS}&amp;amp;quot; -e &amp;amp;quot;VIRTUAL_HOST=${HOSTS}&amp;amp;quot; --restart always wordpress:latest

Once again, lines 1 – 3 update the WordPress image from the Docker repository, stops any existing containers, then removes the stopped containers. Line 4 we create a new named volume before finally launching a new WordPress container. Line 5 is a little different though. Here, we actually link the Storage Container to the WordPress container. This creates a private network between the two for network traffic. This keeps the Storage Container inaccessible from the Internet at large while still allowing the WordPress container to communicate with the databases it’s hosting. The volume we mount to this container stores plugins and uploads and has nothing to do with the database. Oh, and the container starts with configurations to automatically integrate with out NGINX proxy service that handles automatic SSL configurations (maybe a post later on that one)!

Create a Backup Container with scheduled backup job

What’s a website if it’s not backed up? Risk. So, let’s reduce that! Since we have modular storage for each of the containers we are running, we can mount them to other containers as well. This, admittedly, is a bit risky and I don’t recommend this for very busy sites for the simple reason as the data being backed up has the potential to be written to as it’s being read for backup. This can obviously corrupt a backup or fail a web request.

  - docker pull aveltens/wordpress-backup:latest
  - docker stop -t 0 ${BACKUP_CONTAINER} || true
  - docker rm ${BACKUP_CONTAINER} || true
  - docker run --name ${BACKUP_CONTAINER} -v ${BACKUP_VOLUME}:/backups --volumes-from=${WEBSITE_CONTAINER} --link=${STORAGE_CONTAINER}:mysql -e &amp;amp;quot;BACKUP_TIME=0 5 * * *&amp;amp;quot; -d aveltens/wordpress-backup:latest

Lines 1-3 update the container image, stops it, then cleans up. Line 4 starts a new Backup container with a Backup volume mounted. It also has any volume mounted to the WordPress container also mounted and it’s linked to the MariaDB container. This lets the Backup container copy files from the volumes mounted on the WordPress container and it allows database access to the MariaDB. This particular image we use will automatically compress files from the mounted volumes and perform a database dump to a text file before compressing that as well. This all runs on a configurable schedule defined by the BACKUP environment variable. Each interval defined (in this case every 5 hours) these backup files are created then copied to the backups directory, which we conveniently mounted the Backup Volume.

Create a Dropbox Container with scheduled upload job

Now that we have a Backup Volume containing all our important data, we need to store that somewhere less volatile. I picked Dropbox since it has free storage and I don’t intend to keep every backup I make. Thankfully, there’s a Docker image for that!

    - docker pull janeczku/dropbox:latest
    - docker stop -t 0 ${DROPBOX_CONTAINER} || true
    - docker rm ${DROPBOX_CONTAINER} || true
    - docker run -d --restart=always --name=${DROPBOX_CONTAINER} -v ${BACKUP_VOLUME}:/dbox/Dropbox janeczku/dropbox

Once again, lines 1 – 3 are all about updating, stopping, and cleaning up. Line 4 starts the container using the Dropbox image. We mount that Backup Volume to the Dropbox directory. The Dropbox directory is linked with my Dropbox account and anything that gets placed in this directory is automatically uploaded to the cloud. Viola! We have automated backups! Since this container automatically removes backups older than 90 days, I don’t have to worry for a while about reaching the maximum data for the free tier of Dropbox.

Pulling It All Together

We have several stages of our build we are orchestrating: the container, the database, the backup, and the upload. These are all handled in about 20 lines of code. While this isn’t the smoothest of processes I haven’t had any problem and have been able to replicate it for other websites I also am hosting. This brings me a managed method of automating deployments. It’s pretty cheap to put together and I’m sure it has some room for improvements. If you have any ideas on how to improve this solution, share it with the world! Leave a comment below and I will most likely see if I can incorporate your idea into the next iteration.

Hacktoberfest: Minecraft Server

Hacktoberfest: Minecraft Server

Hacktoberfest is upon us! This month I’m hacking on small projects each week and sharing them.

Previously…

A few weeks ago we found a problem with our GitLab Runner and fixed it. This week, we attempted to make a persistent Minecraft Server using a Dockerfile and the new GitLab Runner to deploy it. We hope to get backups running on the Minecraft Server.

Our Minecraft Server we managed to get working was working great… until we realized it didn’t have any backups. We tried looking for something akin to the WordPress Backup container solution. This didn’t quite pan out as it required a bit of container-to-container communications. I’d like to scale Minecraft hosting out, so while this is a solution, it isn’t a very clean one. Plus, I don’t really want to rely on a 3rd party to update the Dockerfile. So, here we are.

Redefined Requirements

Knowing what we want is half the battle. Figuring out how to do it is the actual hard part. So, we kicked back, grabbed some cookies, and started to think. What do we really want in a perfect Minecraft Server?

  1. We want maximum uptime. If there’s an update, rebooting should pick it up. Done!
  2. We want security. If we need to ban someone or whitelist someone this should persist across reboots. TODO
  3. We want safety. Rebooting should reload the existing world. If something corrupts it, we should be able to recover from a previous backup. TODO

Safety First

For this week, we focused on safety. We want to save our hard work building amazing things so we don’t lose it unexpectedly. To do this, we will need to safely stop the auto save, manually save the world state, back up all of the world files, then start the auto save. This is ideally scheduled as some sort of scheduled task that kicks off every day (or hour). To have the server interact with Minecraft, we will need some sort of RCON utility. So. we leveraged out new-fangled GitLab Runner to help us out.

Getting an RCON utility into a Docker image seemed rather straight-forward. Go get it, make it available to the build context, then copy it to the image giving it executable permissions. Seems easy enough, we can eve use GitLab artifacting since its in the same pipeline!

<br>
rcon-setup:<br>
  stage: stage<br>
  image: golang:latest<br>
  script:<br>
    - "go get github.com/SeerUK/minecraft-rcon/..."<br>
    - "go install github.com/SeerUK/minecraft-rcon/..."<br>
    - "mkdir bin"<br>
    - "cp $GOPATH/bin/minecraft-rcon ./bin"<br>
  artifacts:<br>
    paths:<br>
      - bin/<br>

Here we have a stage (conveniently called stage. I know, so creative!) this runs on the latest Go container and simply pulls the source code to the local Go source path then compiles and installs the binary to the Go binary path. We copy it to the bin directory and artifact it! Now the artifact is in GitLab and is available to downstream dependencies. Let’s build the Docker image!

<br>
build:<br>
  stage: build<br>
  image: docker:latest<br>
  dependencies:<br>
    - stage<br>
  services:<br>
    - docker:dind<br>
  before_script:<br>
    - "docker login -u $CI_REGISTRY_USER -p $CI_REGISTRY_PASSWORD $CI_REGISTRY"<br>
  script:<br>
    - "docker build -t ${CI_REGISTRY_IMAGE}:${CI_COMMIT_REF_NAME} --pull ."<br>
    - "docker push ${CI_REGISTRY_IMAGE}:${CI_COMMIT_REF_NAME}"<br>
  after_script:<br>
    - "docker logout ${CI_REGISTRY}"<br>
  tags:<br>
    - docker<br>

Simple stuff here. Let’s take a look at the Dockerfile itself

<br>
FROM alpine:latest<br>
ARG MC_VERSION=1.13.1<br>
ARG MC_JAR_SHA1=fe123682e9cb30031eae351764f653500b7396c9<br>
ARG JAR_URL=https://launcher.mojang.com/mc/game/${MC_VERSION}/server/${MC_JAR_SHA1}/server.jar<br>
ARG MIN_MEMORY='256M'<br>
ARG MAX_MEMORY='1024M'<br>
ARG MC_CLIENT="c2technology"<br>
ENV CLIENT ${MC_CLIENT}<br>
ENV _JAVA_OPTIONS '-Xms${MIN_MEMORY} -Xmx${MAX_MEMORY}'<br>
RUN mkdir -pv /opt/minecraft /etc/minecraft<br>
RUN adduser -DHs /sbin/nologin minecraft<br>
COPY bin/minecraft-rcon /usr/bin/minecraft-rcon<br>
COPY backup /usr/bin<br>
COPY entrypoint.sh /etc/minecraft<br>
RUN apk add --update ca-certificates openjdk8-jre-base tzdata wget \<br>
    &amp;amp;&amp;amp; wget -O /opt/minecraft/minecraft_server.jar ${JAR_URL} \<br>
    &amp;amp;&amp;amp; apk del --purge wget \<br>
    &amp;amp;&amp;amp; rm -rf /var/cache/apk/* \<br>
    &amp;amp;&amp;amp; chown -R minecraft:minecraft /etc/minecraft /opt/minecraft \<br>
    &amp;amp;&amp;amp; chmod +x entrypoint.sh<br>
EXPOSE 25565<br>
USER minecraft<br>
WORKDIR /etc/minecraft<br>
ENTRYPOINT ["./entrypoint.sh"]<br>

Starting with a minimal Linux Alpine container, we set some arguments to the Dockerfile. These can be overwritten as arguments passed to the docker build command. They must be defined in the Dockerfile in order to override them. We have some reasonably safe defaults here. We set some environment variables in the resulting container, make a directory, add a user, then we copy the RCON Go binary (from the artifacts copied into the Docker build context by GitLab’s artifact system) over to the container as well as the backup script we wrote. Then we install some dependencies, expose the Minecraft server port, switch to the Minecraft user, set the working directory, then run the entrypoint.sh script. Let’s take a look at that entrypoint.

<br>
echo 'eula=true' &amp;gt; /etc/minecraft/eula.txt<br>
crontab -l | { cat; echo "0 */6 * * * backup"; } | crontab -<br>
java -jar /opt/minecraft/minecraft_server.jar nogui<br>

Not too complicated. This auto-accepts the EULA (Minecraft requires this to run) then sets up a job that runs every 6 hours to execute a backup command. Then finally runs the Minecraft server. This is what we wanted to be able to do in the first place — back things up on a schedule. We could have the scheduled interval for running the backup command configurable, which we will most likely do after we get this thing working (this is Hacktoberfest after all). So… let’s take a look at that backup script.

<br>
#!/bin/sh<br>
minecraft-rcon save-off<br>
minecraft-rcon save-all<br>
tar czf /opt/backups/$(date +%Y-%m-%d)-mc-${CLIENT}.tar.gz /opt/minecraft/<br>
minecraft-rcon save-on<br>

Easy peasy! using that new minecraft-rcon binary, we turn automatic saving of the Minecraft world off so we can access it without it changing on us (and corrupting backup). We make one final save, tar it all up, then turn automatic saving back on. This seems to be the right thing to do so we don’t corrupt the world or save a corrupted version. We’ll see if this actually works when we get it running. If not, this is the file we can update to get it to correctly work — even if it means stopping the Minecraft service then restarting it.

Now that we have the Docker container published to our repository, we can update the existing Minecraft Server YAML to use it!

<br>
deploy:<br>
  script:<br>
    - docker pull minecraft-docker:latest<br>
    - docker exec minecraft backup<br>
    - docker stop minecraft || true<br>
    - docker rm minecraft || true<br>
    - docker run -d --name minecraft -p 25565:25565 \<br>
        -v minecraft-world:/opt/minecraft/data/world \<br>
        -v minecraft-config:/opt/minecraft/config \<br>
        -v minecraft-mods:/opt/minecraft/mods \<br>
        -v minecraft-plugins:/opt/minecraft/plugins \<br>
        --restart always minecraft-docker:latest<br>
    - docker cp ./config/* minecraft:/opt/minecraft/config/<br>
    - docker cp ./data/* minecraft:/opt/minecraft/data/<br>
    - docker cp ./mods/* minecraft:/opt/minecraft/mods/<br>
    - docker cp ./plugins/* minecraft:/opt/minecraft/plugins/<br>
    - docker exec minecraft backup<br>
    - docker restart minecraft<br>

We kick things off by pulling the latest minecraft-docker image. This will pull the private repository image we just published into the local Docker-in-Docker container that’s running this build. Then we backup the existing world if it exists before stopping the current Minecraft server. After that, we remove it and create a new container with various mounts. We then copy over the configurations and anything else we have version controlled before backing it up once again and restarting it. We back it up so many times right now because we’re not sure if this will corrupt the world data. Once we do know what happens, we will come back and clean this up a bit.

Conclusion

Ultimately, we didn’t hit our goal to get this working in a week. However, we will continue to work on this so our world can be saved (if only it were that easy)! If you have any tips or thoughts on this, please comment below! I’d love to hear about your solutions or for you to share your experience if you’ve done something similar.